On the date this article is published, we are exactly two weeks away from the 2017 Total Solar Eclipse, one of the most anticipated astronomical events in our lifetime.
By now, most people have made their eclipse viewing plans. Some will travel to a destination to experience totality, some already are in the path of totality and the vast majority of people will enjoy the eclipse where they live.
No matter which of these represents your situation, you need to have a plan. It can be as simple as: 1) Bought solar glasses; 2) Confirmed the time of the eclipse in your area; and 3) made sure that at where you plan on observing the eclipse there are no obstructions of the actual eclipse (trees, buildings, etc.).
If you plan to be more active with the eclipse, as of today, there is still plenty of time to get solar glasses, solar telescopes or binoculars, solar filters and more. We’ve checked with many astronomy retailers, and while inventories are tight, they still have solar eclipse specific equipment available.
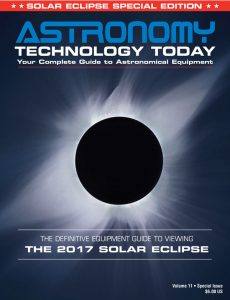 The Astronomy Technology Today editorial staff would like to take this opportunity to remind you of the availability of our Solar eclipse equipment guide – The Definitive Equipment Guide to the 2017 Solar Eclipse. Our goal with the 40-page publication is to provide an easy-to-consume introduction to the technological options for viewing and imaging the Great Solar Eclipse.
We cover the gamut of options available including building your own solar viewer, solar glasses, smart phones, DSLR cameras, using astronomy telescopes, solar telescopes, using binoculars, solar filters (including a DYI filter option), CCD astro cameras, astro video cameras, webcams and much more. Included is a comprehensive list of astronomy retailers.
You can view the guide on our website here – its free and there is no requirement to sign up to read the guide.
As for your checklist, Brian Ventrudo with Astronomy Connect has put together an extensive checklist that covers virtually every situation. We have listed his recommendations below, and he also provides a PDF printable version of the checklist that you can print out and use.
2017 Total Solar Eclipse Checklist
Select the best location for seeing the total eclipse based on accessibility and weather prospects
– Select an alternate location and a route to that location
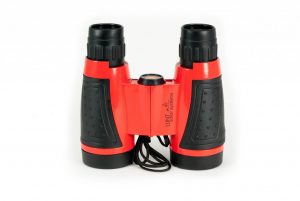
– Build your kit of solar observing accessories including eclipse glasses, solar viewing cards, solar filters for your telescope, and solar binoculars
 – Review the details how a solar eclipse works including the phases of a solar eclipse and the phenomena you can expect to see during the event
– Use a planetarium app such as Stellarium to find out which bright stars and planets to expect to see in the sky during totality
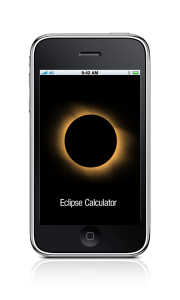
– Determine the exact time of the beginning and end of the partial and total phases of the eclipse for your primary and secondary observing locations. This link will help, or you can get a copy of Fred Espenak’s Eclipse Bulletin)
During the Week Before the Eclipse
– Pack the equipment you need to see and image the eclipse including telescopes, eyepieces, mounts, power sources, binoculars, solar filters, cameras, lenses, remote release, and tripods
– Test and ensure all equipment is working by doing a ‘dry run’ during a daytime solar observation session
– Pack a notebook or audio recording device to help you take notes before, during, and after the eclipse
– Pack tent, sleeping bags, dry food, water, and other camping equipment for the night before and after the eclipse in case you need to travel far from your expected base
– Check to ensure your solar filters fit securely on your telescope
– Review the timing of the eclipse for your expected and alternate observing locations
The Day of the Eclipse
– Wake up early and check the weather forecast
– Leave early for your observing location
– Set up your equipment for observing and/or imaging
– Test your equipment and check its operation
– Review your observing and imaging plan
Observing the Eclipse: From the Beginning Until Totality
 – With your telescope or binoculars and solar filter, or with your solar glasses, note the earliest time at which you notice the beginning of the eclipse.
– Examine the Sun’s visible face for sunspots, faculae, and limb darkening
– Note changes in atmospheric conditions such as temperature, barometric pressure, wind speed, and cloud formation as the eclipse moves towards totality
– As the partial phase of the solar eclipse progresses look for projections of the Sun’s partially eclipse image cast on the ground by gaps between the leaves of a tree
– Look for changes in brightness, color, and contrast of the surrounding landscape
In the Last Minute Before Totality
– Watch for Baily’s Beads or Diamond Ring Effect (while still wearing your eclipse glasses)
– Watch for the arrival of the Moon’s shadow across the landscape (especially if you are in an elevated location)
– Observe changes in bird and animal behavior
During the Brief Time of Totality
NOTE: This is the only time you can safely look at the eclipse, and you can only see the total eclipse if you are on the path of narrow path of totality at the right time. Once Baily’s Beads or the Diamond Ring disappear and the Moon covers the Sun, it is safe to remove your eclipse glasses.
– Remove your eclipse glasses and examine the spectacle
– If you are going to take photographs, remove the solar filter from your camera during the brief phase of totality
– Look for the Sun’s silvery corona and note its shape and the configuration of its ‘streamers’ of light
– Look for the red glow of the Sun’s chromosphere just around the rim of the Moon. If you have optical aid such as binoculars, look for solar prominences
– Look for bright stars and planets near the Sun and around the sky
– Note the change in temperature and the brightness and color of the sky, clouds, and surrounding landscape
– Note your own feelings and reaction to totality; even experienced amateur and professional astronomers are unexpectedly awestruck at the sight of a total solar eclipse
– As the Moon begins its exit from the Sun’s bright face, watch for the return Baily’s Beads or Diamond Ring Effect. NOTE: At this point, you MUST put your eclipse glasses back on and cover your camera, telescope, or binoculars with their solar filters.
After the Eclipse
– Back up your photos
– Record your observing notes and personal impressions in audio or written format
– Pack up (and make sure you haven’t left anything behind)
– Start planning for the next one!
Equipment Checklist
For Visual Observing
– Eclipse glasses, solar viewer, or hand-held solar filters
 – Cell phone (for weather updates, time of day, GPS and map, and audio recording capabilities)
– Note book
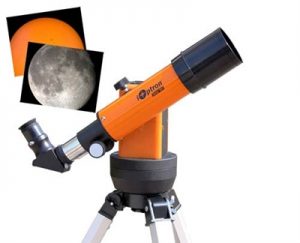
– Telescope
– Mount
– Eyepieces
– Binoculars
– Solar Filters (for telescope and binoculars)
– Solar Finder
– Flashlight
– Power sources (for mounts, cameras, etc.)
– Small toolkit for repairs (multi-use screwdriver, Allen wrenches, small knife, multi-tool)
– Plastic bags or tarps (to protect electronics from rain)
– Compass (to help align equatorial mount, if applicable)
For Photography and Imaging
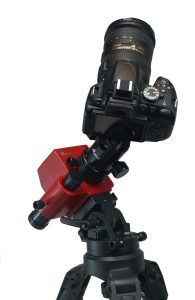 – Camera
– Solar filter for camera lens
– Camera Tripod
– Lenses (if using a DSLR)
– Memory card (at least two)
– Extra batteries
– Adapters to attach camera to telescope (if applicable)
– Imaging plan
Eclipse Timing and Planning
At your expected observing location, record the timing of the eclipse (and note the correct time zone)
– Location Name
– First Contact (partial eclipse begins)
– Second Contact (total eclipse begins)
– Third Contact (total eclipse ends)
– Fourth Contact (partial eclipse ends)
At your alternate observing location, record the timing of the eclipse (and note the correct time zone)
– Location Name
– First Contact (partial eclipse begins)
– Second Contact (total eclipse begins)
– Third Contact (total eclipse ends)
– Fourth Contact (partial eclipse ends)

